Input Map
namespace: qASIC.InputManagement.Map
Introduction
Input Map is a container for every action and axis in your project.
Creating a new Map
To create an Input Map go to Create/qASIC/Input/Input Map and assign it in Project Settings/qASIC/Input. To edit simply double click or press the "Open editor" button in the inspector. This will bring up the Input Map Editor.
Basic editor usage
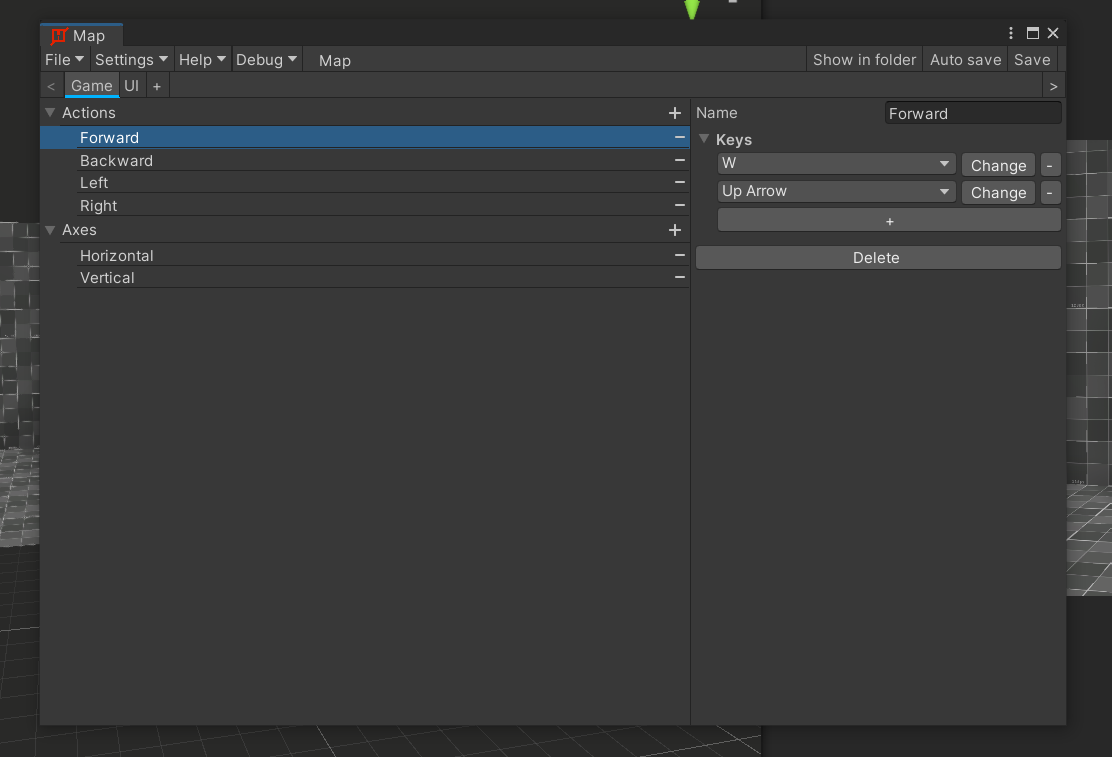
The editor is separated into two main panels - tree (on the left) and inspector (on the right).
Creating actions and axes
To create a new action or axis press the plus button next to the corresponding list. Alternatively open up the right click menu by clicking on an item and press "Add".
Deleting
Every action and axis has a minus button on the right side. Alternatively they can be deleted from the right click menu.
Editing an action
To start editing an action select it from the tree view. This will bring up the inspector in which you are able to modify action's properties.
| Element | Description |
|---|---|
| Name | Name of the action. |
| Keys | Keys of the action. You can add and remove keys as well as listen for input. |
| Delete | Deletes the action. |
Editing an axis
To start editing an axis select it from the tree view. This will bring up the inspector in which you are able to modify axis's properties.
| Element | Description |
|---|---|
| Name | Name of the axis. |
| Positive | Name of the positive action. |
| Negative | Name of the negative action. |
| Delete | Deletes the axis. |
Saving
Saving shortcuts are placed on the top right corner. This is where you are able to toggle auto saving and save manually. This can also be achieved by going to the editor's toolbar under the File section.
Advanced editor usage
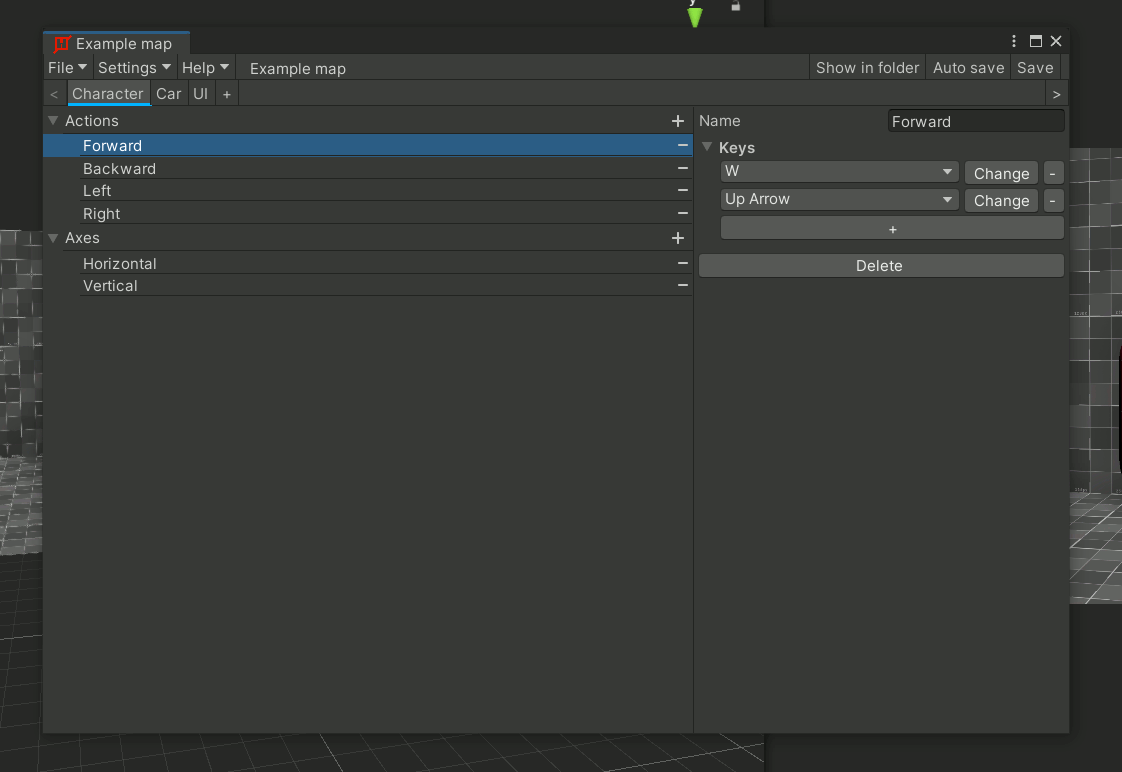
For more advanced users the editor allows for grouping in order to separate different actions and axes from each other.
Grouping
Below the toolbar there is the group bar. By default there is only one group titled 'Default'. Different groups can have actions of the same name, which is useful when for example: there are two separate groups for human controls and car stearing. Groups can also be used for separating gameplay buttons from UI.
To get an action or axis from a group, specify it's name while calling Input Manager methods.
public void Example()
{
    InputManager.GetInputDown("UI", "console");

    //character input
    Vector2 characterVector = new Vector2();
    characterVector.x = InputManager.GetMapAxis("character", "horizontal");
    characterVector.y = InputManager.GetMapAxis("character", "vertical");

    //car input
    Vector2 carVector = new Vector2();
    carVector.x = InputManager.GetMapAxis("car", "horizontal");
    carVector.y = InputManager.GetMapAxis("car", "vertical");
}
Default groups
Every input map contains a default group. This group gets used by default if a group name isn't specified.
public void Example()
{
    //This method will use the 'console' action from group 'UI'
    InputManager.GetInputDown("UI", "console");

    //This method will use the 'jump' action from the default group
    InputManager.GetInputDown("jump");
}
This group is indicated by the blue underline on the group bar. It can be changed by right clicking on a group and selecting 'Set as default' or from the inspector.
Editing a group
To start editing a group select it from the group bar. This will bring up the inspector in which you are able to modify group's properties.
| Element | Description |
|---|---|
| Name | Name of the group. |
| Set as default | Sets group as default. |
| Delete | Deletes the group. |
Settings
You can change the window's settings by going to Settings/Window settings. These settings are local and changing them won't affect your repository.
Auto save
Auto save (as the name suggests) lets you change if the map should get saved automatically every time you change something. This can also be toggled in the right side of the toolbar.
Auto save time limit
Auto save time limit allows you to specify the minimum time required for auto save to trigger.
Default group color
This setting allows you to change the color of the bar that gets displayed under the default group.
Show Item Icons
This setting toggles the visibility of icons that show up next to certain hierarchy items and inspector fields.
Reset preferences
Resets preferences.